After over a year, here’s the next instalment of my Git tutorial! In this video we look at the difference between rebasing and pulling from remote repositories. Sorry it took so long!
Behaviours Demo – Android Programming
Hey Everyone
So this week I became a member sponsor on www.3dbuzz.com. The first thing I had a look at was their XNA Behaviour Programming videos, which are the first in their set on AI programming. However, not being particularly interested in XNA, I implemented the algorithms presented in the videos for Android.
Here’s a video of the demo running on my Nexus One:
Since I was on Android and only using the Android and OpenGL ES libraries, I had to write a lot of low level code to replace the XNA functionality that 3DBuzz’s videos rely on. I also had to implement an on-screen joystick. I might write up a couple of posts on the more interesting parts of the code (what is not in the videos) soon.
Thanks
Michael
Join the conversation!
Hit me up on Twitter or send me an email.Augmented Foam Sculpting for Capturing 3D Models
This weekend I presented my paper, Augmented Foam Sculpting for Capturing 3D Models, at the International symposium on 3D user interfaces. Since the conference has passed, I have added the video to youtube and the paper to my publications page. First, the video, then some discussion after the jump.
Foam Sculpting
The inspiration for this work came out of a project we did with some industrial design students. Their job was to create some input devices for my SAR Airbrushing system. First up, we had a meeting where I showed them a very early stages of development version of the system, to give them an idea of what we were doing. They went away and came up with ideas for input devices, and in the next meeting had a bunch of sketches ready. We discussed the sketches; what we liked and what we didn’t like. Next, they brought us foam mockups of some of the designs. We discussed these, and then eventually they came back with full CAD models ready for 3D printing.
They did a great job by the way. But it got us thinking:
How can we make this process better?
Augmented Foam Sculpting is the result of this work. It allows a designer/artist to simultaneously create a physical design mockup and matching virtual model. This is a Good Thing™, because it utilises the skills and tools that designers are already using.
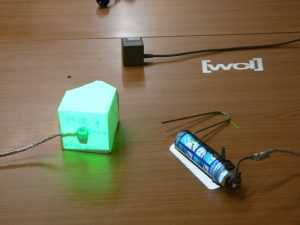
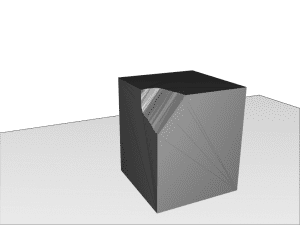
The system works by tracking the position and orientation of both the hot wire foam cutter, and the piece of foam the user is sculpting. We can track the motion of the hot wire as it passes through the foam.
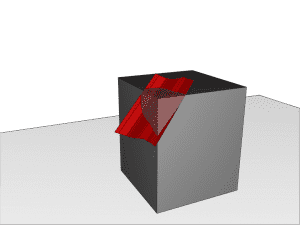
From there, we can create geometry that matches the cut path, and perform a Boolean difference operation on the foam geometry.
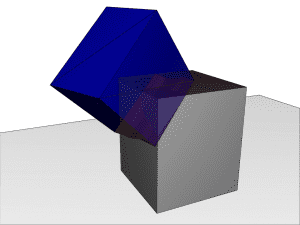
This replicates the cut in the physical object in the 3D model .
Using projectors, we can add extra information to the foam as the user sculpts. We implemented 2 visualisations to aid designers when creating specific models.
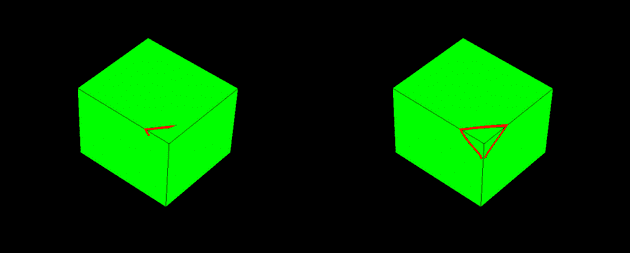
Cut Animation displays cuts to be made as animated lines on the foam surface. Once a cut has been made, the system moves to the next one. This visualisation could be used to recreate a previous object, or to instruct novices. An algorithm could be developed to calculate the actual cuts that need to be made, reducing the amount of planning needed when making an object.
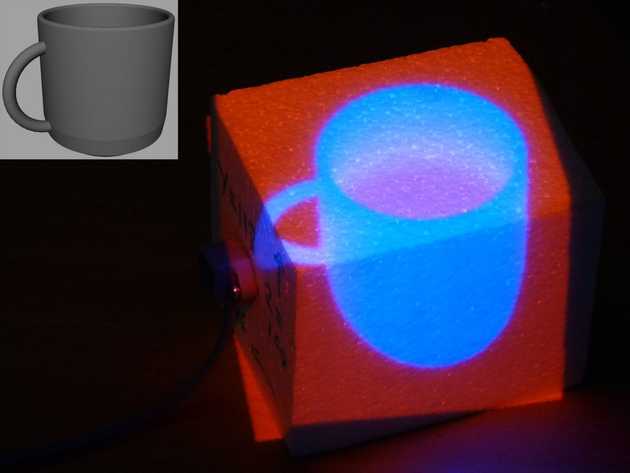
The second visualisation, Target, projects a target model so that it appears to be inside the foam. The foam is coloured based on how much needs to be removed to match a target model. This could be used to create variations on a previous model.
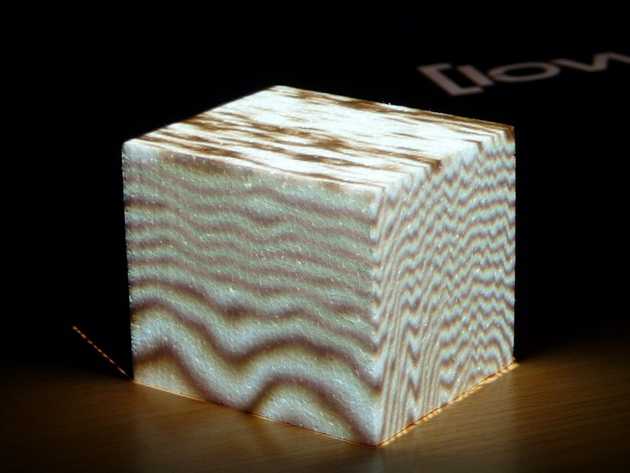
Finally, we can use 3D procedural textures to change the appearance of the foam. For example, we implemented a wood grain 3D texture. This works pretty well, because as you cut away the foam, the texture updates to appear as though the wood was actually cut. 3D textures are also ideal because we don’t need to generate texture coordinates after each cut.
For all the details, please have a read of the paper. If you have any questions/comments/feedback/abuse, please comment on this post, or send me an email.
Join the conversation!
Hit me up on Twitter or send me an email.Git Tutorial 03 – Pushing & Pulling
In the last video, we just looked at adding files and commiting changes. This is great, but remember that in Git, commits are local. In this video we look at how we can set up remote repositories that we can push data to, either to use as backups, or for sharing with others.
Notes
I cannot believe I messed up the remote path that many times! I am sorry about that. Of course, the side effect is you learnt how to both add and remove remotes. So yeah… I did that on purpose.
At this point, we can create a project or join an existing one. We can add files and commit changes. We can push our changes to remotes, and fetch changes that other people have made. This is all great. However, we haven’t touched on one of Git’s most powerful features. I am of course talking about branching and merging. This will be the priority for the next video.
Again, any feedback is much appreciated.
Join the conversation!
Hit me up on Twitter or send me an email.Git Tutorial 02 – The basics
This video hits up the terminal and starts using git. We start by creating a git repository, which is super easy with Git. Then, we look at adding files to the repository, and commiting changes.
Notes
In this video, I specifically create a project using:
git init
. If you are working on your own projects, this is how you will work. However, a lot of the time you will be starting work on an already existing project. In this case, you don’t create a new repo using git init, instead you clone an already existing repository. The basic is this:
git clone path/to/repository
I will cover this in a later video, but I think it is important enough to mention here.
Another thing that I could have covered in more detail is the staging area. There is actually a lot more that you can do with it than I mentioned in this video. However, that will come later. For the first 3 videos (at least) I want to just get the basics down.
