Web Audio is an amazingly powerful new Javascript API for building complex audio and music applications in the web browser. I wanted to check it out, so I built Syntho. You can try Syntho out right now!

Syntho is a monophonic synthesizer inspired by the Korg Volca Bass. It features 3 oscillators with sine, saw, triangle, and square wave shapes over 6 octaves. Each oscillator can be detuned independently, giving nice/horrible pulsing as the oscillators go in and out of phase.

A low pass filter with resonance affects the sound of the oscillators. The filter self oscillates if you push the resonance way up.

There is a low frequency oscillator that can be set to affect the pitch of the sound generating oscillators, or the filter cutoff point. The LFO supports triangle and square waveshapes.

Finally, there is an ADSR envelope generator. The ADSR can be set to control the amplitude of the sound, or the filter cutoff point, or both.

Syntho is completely modern Javascript. I use ES6 transpiled with Babel, Handlebars for keeping the HTML sane, and Twitter Bootstrap because I’m lazy with CSS.

The inner workings of Syntho and web-audio will probably be the subject of another series of video tutorials. But for now, the code is on GitHub.

Join the conversation!

Hit me up on Twitter or send me an email.

So I’ve been messing around with DIY guitar effects. In this post I’m going to talk about my variant of the Bulk Fuzz, a simple but crazy fuzz circuit from Joe Gore at Tonefiend.

By the way,  if you are interested in guitar hacking, then Tonefiend is a really awesome website – whether it be weird pickup configurations and wiring schemes, effect circuits, etc. Joe does a really awesome job. The Bulk Fuzz is part of a series on DIY guitar effects.

So, this is not my first attempt at guitar effect circuits. A little while ago I came across a schematic from Barber Electronics. Armed with enough knowledge to read a schematic, but not enough to understand what the circuit was actually doing, I set forth to recreate the pedal. You can have a look at my progress, but long story short I made a mistake in the board layout and sent 9V to the opamps instead of 4.5. Woops! So, after a hiatus I’ve come back to the Bulk Fuzz. It is a much simpler ciruit, a lot easier to see what’s going on.

The Build

My version is based on Joe’s, but with some different capacitor values, and with gain and volume controls (more on that later). Here’s the schematic:
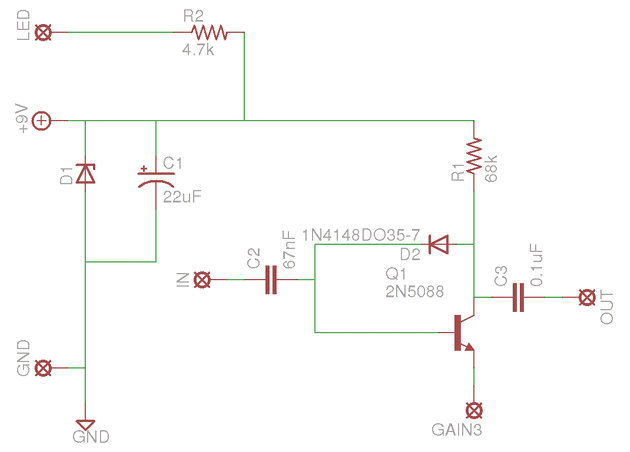
My variation on the Bulk Fuzz

I built the circuit using perfboard. Last time I used perfboard I made a mistake in transferring. So, this time I used the board layout in Eagle to lay the board out as if I was going to etch a PCB, just to use as a guide for populating the board:
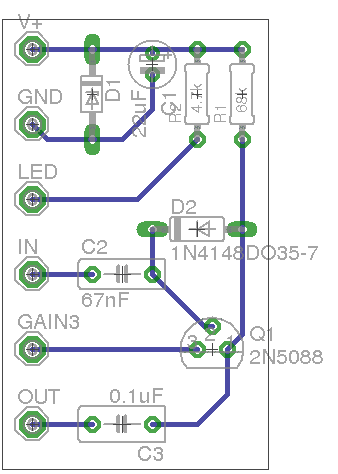
The board layout

And with that, started soldering. Here are a few picks of the build:
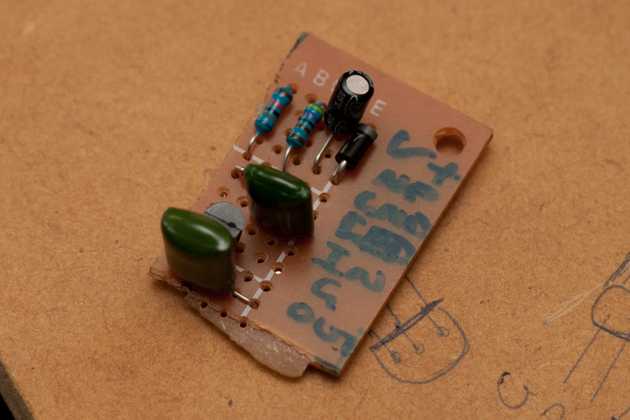
The circuit, transferred to perfboard

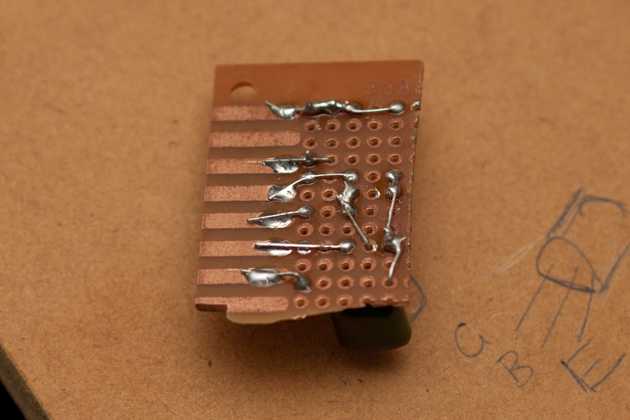
The underside of the perfboard. As clean as I could make it

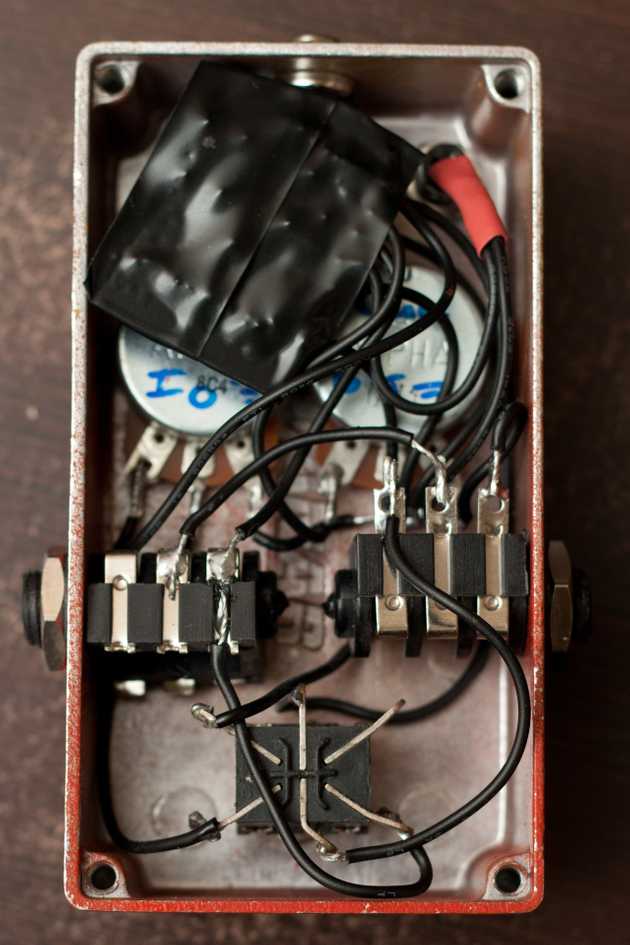
There is not a lot of room in the box!

The Sounds

This circuit is just a bit ridiculous. Here are some sounds, played on a Les Paul, through a vintage Goldentone Reverbmaster amp, SM57 close mic’d, into an FMR Audio Really Nice Preamp, and into the computer. (ignore my terrible playing).

I really, really like the crazy grating overdrive. This pedal sounds awesome at doing what it’s good at. In fact, it’s probably easier to discuss what it isn’t good at…

You’ll notice that palm muting is loose and muddy. You also hear some pretty extreme gating, which cuts the note sustain right off. Changing the value of the input capacitor seems to affect this gating, but if anyone can clue me in on the specifics that would be awesome.

I mentioned above that I have a gain control on the pedal. I didn’t really have a reason for this, other than I already had it wired into the box from a previous failed pedal, and couldn’t be bothered changing it around. However, after trying out the circuit, I only really like it at full gain – I will never use the gain pot. I think on my next build I will have a tone control that fades between input capacitor values instead.

Some Lessons

Here are the things I’m taking home from this experiment:

  • Don’t be lazy and put a gain control in if you never intend to use it – have controls you actually want.
  • 24mm potentiometers are way too big – I can’t even fit a battery into this box because the pots take up too much room. This is all I could get from my local Jaycar, but next pedal I’ll definitely use 16mm or even 9mm pots.
  • While I’m complaining about Jaycar, the jacks I got are crap and don’t do a very good job of holding the guitar leads in. Better jacks are needed in the future.
  • I only had a 2 pole footswitch to use, so I switched the output and power. The problem is that I don’t really have true bypass, and the circuit affects the sound even when it is not enganged. There are a couple of things I would like to try with this. One, I need to go on eBay and get some triple pole switches. Another option I was thinking about is using small relays. I took my tuner pedal apart to see what I could see, and I saw it was using a relay to switch the signal. Probably overkill for a simple fuzz, but interesting none the less.

In Conclusion

I really like the sounds from this circuit. However, since I never plan on using the gain control, it is a bit of a one trick pony. I think I’ll tweak it and my next version will have a tone control instead of a gain. Still, it’s good to finally have a DIY guitar effect that works! I might take another swing at the LTD…

Join the conversation!

Hit me up on Twitter or send me an email.
Posted on June 06, 2012Music & AudioTags: diy, effect, fuzz, guitar, music, pedal, recording

Well a little while ago I thought I would tidy up my mess of a recording setup. The best way to do this you ask? A rack! Today I will outline the process involved and maybe even post up some plans.

So, racks are useful for tidying up all that rackmounted gear and making the setup look all the more professional. You can of course buy premade racks as studio furnature, but they are generally pretty expensive. So, I decided to make my own. First some design constraints.

  • Should be cheap!
  • Should look good (great)
  • Should be around 10-12U in size
  • Sturdy
  • On wheels

After looking around, I decided to build a 12U rack. I originally had drawn up plans for a 10U one using mounting strips from Allans Music. However, it turns out that Derringers could sell me 2 metres for the rack stripping for the same price! So, this design is for 12 units, and I’ve got a bit spare for some extra things later.

Shopping List

Here’s what you’ll need to build this thing:

  • 24 units worth of rack stripping. Or if you prefer, you can mount the rack gear by screwing into wood.
  • 1/2 sheet (1600×600) of 16mm board of some kind.
  • Iron on veneer strips for the visible edges of the board
  • 4 casters so the rack will roll around easily
  • Screws and glue

And thats it. I used Meranti veneered particle board for mine because it was all I could find as a 1/2 sheet. What you choose will depend on the look you want, but don’t get anything thinner than 16mm, you want this to be able to support the gear.

Planning it out

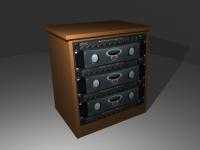
Before I cut anything, I did some planning in Maya of all programs. Maya doesn’t do real world measurements *that* well but I made do. Basically I needed to make sure of the dimensions before I bought anything. Needed to have the design figured out before any money changed hands. Below is a render from maya showing the rough design.

The end result

Once I had the 3D design working I drew it up in 2D to get it to fit onto a sheet of particle board. As it turns out we only need a 1/2 sheet for this rack.

Construction is fairly straight forward. Cut all the pieces, and join them together by screwing and gluing butt joints. No fancy stuff here. Once the main frame is assembled you iron on the stripping to all the visible edges of the board. Finally, a few coats of clear and the rack was done. Here is the final result:

Some things to think about

If you are thinking about making something like this, you’ll want to play with this design to find something that works for you. For example, you might need a cabinet with a greater depth. Mine is fairly narrow, for example if you wanted to mount a computer case in there, it would stick out the back. This isn’t a problem because I only plan on having fairly shallow studio gear in it.

BIG DISCLAIMER: After building this everything fits nicely, but there is pretty much no gap on the sides of the rack gear. If I did this again it would be a couple of mm wider. Just letting you know that you HAVE to make sure your gear fits before you start putting it all together. Measure twice, cut once!

Useful Links

This design came about after looking at a lot of commercially made racks available, and of course some of the great DIY jobs seen in different forums. The main ones:

metalhead28’s rack
andycerrone’s rack
fabfour1257’s design

The Plans

And without further delay, the PDF:

Rack Plans

Join the conversation!

Hit me up on Twitter or send me an email.
Posted on July 11, 2007Music & AudioTags: audio, plans, rack, recording, studio